FTP : Vsftpd Over SSL/TLS2024/02/15 |
|
Vsftpd を SSL/TLS で利用できるように設定します。
|
|
| [1] | 自己署名の証明書を作成します。 Let's Encrypt 等の信頼された正規の証明書を使用する場合は当作業は不要です。 |
|
root@www:~ # mkdir /usr/local/etc/ssl root@www:~ # cd /usr/local/etc/ssl root@www:/usr/local/etc/ssl # openssl req -x509 -nodes -newkey rsa:2048 -keyout vsftpd.pem -out vsftpd.pem -days 3650 Generating a RSA private key .........+++++ .......+++++ writing new private key to 'vsftpd.pem' ----- You are about to be asked to enter information that will be incorporated into your certificate request. What you are about to enter is what is called a Distinguished Name or a DN. There are quite a few fields but you can leave some blank For some fields there will be a default value, If you enter '.', the field will be left blank. ----- Country Name (2 letter code) [AU]:JP # 国コード State or Province Name (full name) [Some-State]:Hiroshima # 地域(県) Locality Name (eg, city) []:Hiroshima # 都市 Organization Name (eg, company) [Internet Widgits Pty Ltd]:GTS # 組織名 Organizational Unit Name (eg, section) []:Server World # 組織の部門名 Common Name (e.g. server FQDN or YOUR name) []:www.srv.world # サーバーの FQDN Email Address []:root@srv.world # 管理者アドレスroot@www:/usr/local/etc/ssl # chmod 600 vsftpd.pem |
| [2] | Vsftpd の設定です。 |
|
root@www:~ #
vi /usr/local/etc/vsftpd.conf # 最終行に追記
rsa_cert_file=/usr/local/etc/ssl/vsftpd.pem
rsa_private_key_file=/usr/local/etc/ssl/vsftpd.pem
ssl_enable=YES
ssl_ciphers=HIGH
force_local_data_ssl=YES
force_local_logins_ssl=YES

# システムでファイアウォールサービス稼働中の場合は
# PASV ポートを固定した上で ファイアウォール側で同ポートを許可
pasv_enable=YES
pasv_min_port=60000
pasv_max_port=60100
service vsftpd restart |
|
FTP クライアント : FreeBSD
|
|
FTP クライアントの設定です。
|
|
| [3] | FTP クライアントインストール済みとして、FreeBSD クライアントの場合、以下のように設定して FTPS に接続します。 接続後は通常通りの操作でファイル転送可能です。 |
|
freebsd@client:~ $
vi ~/.lftprc
# create new set ftp:ssl-auth TLS set ftp:ssl-force true set ftp:ssl-protect-list yes set ftp:ssl-protect-data yes set ftp:ssl-protect-fxp yes set ssl:verify-certificate no lftp -u freebsd www.srv.world Password: lftp freebsd@www.srv.world:~> |
|
FTP クライアント : Windows
|
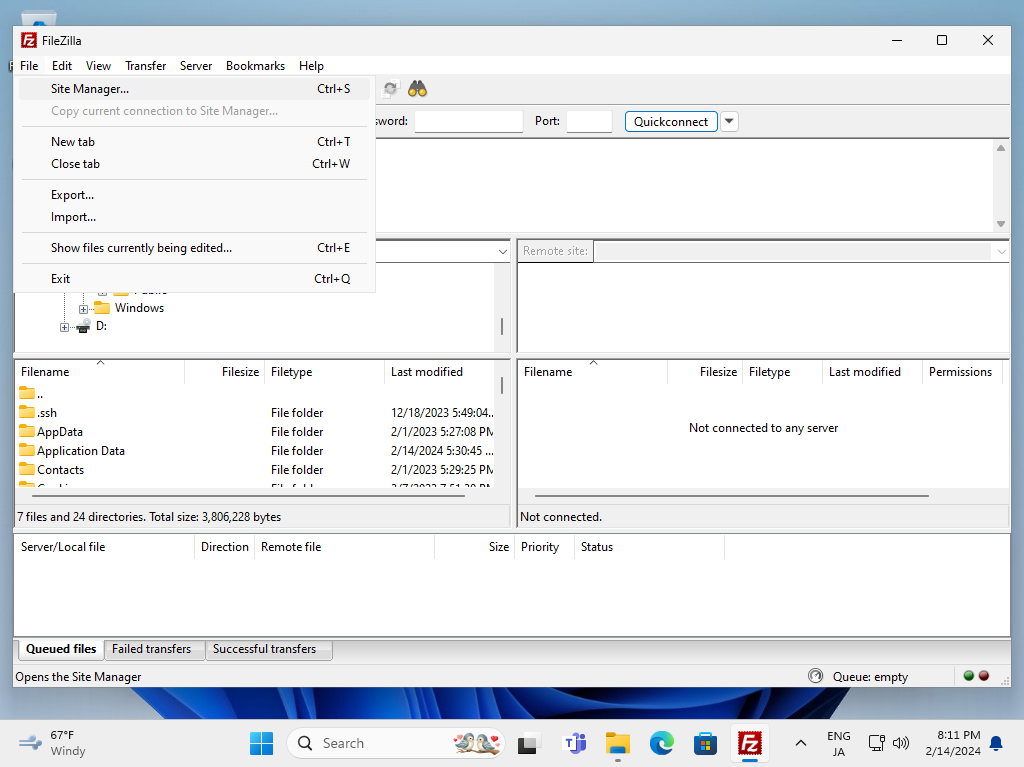
| [4] | Windows にインストールした FileZilla での FTPS 接続の設定です。 [ファイル] - [サイトマネージャー] を開きます。 |
|
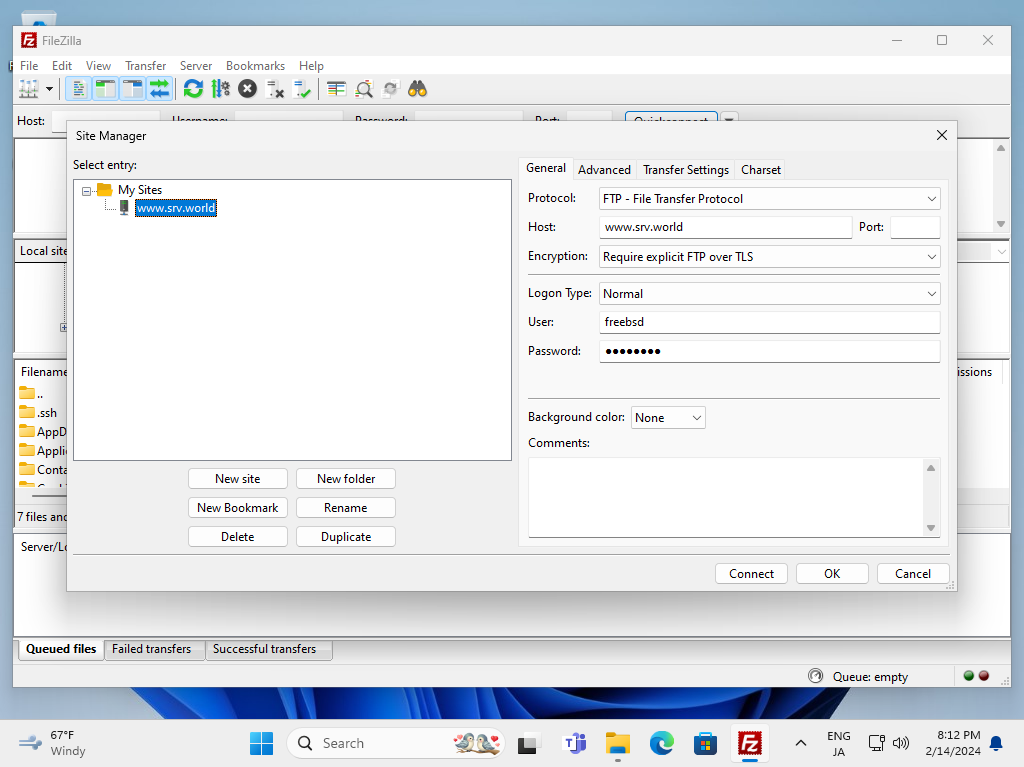
| [5] | 以下のようにサーバーに接続する情報を入力して接続します。[暗号化] には [明示的な FTP over TLS が必要] を選択します。 |
|
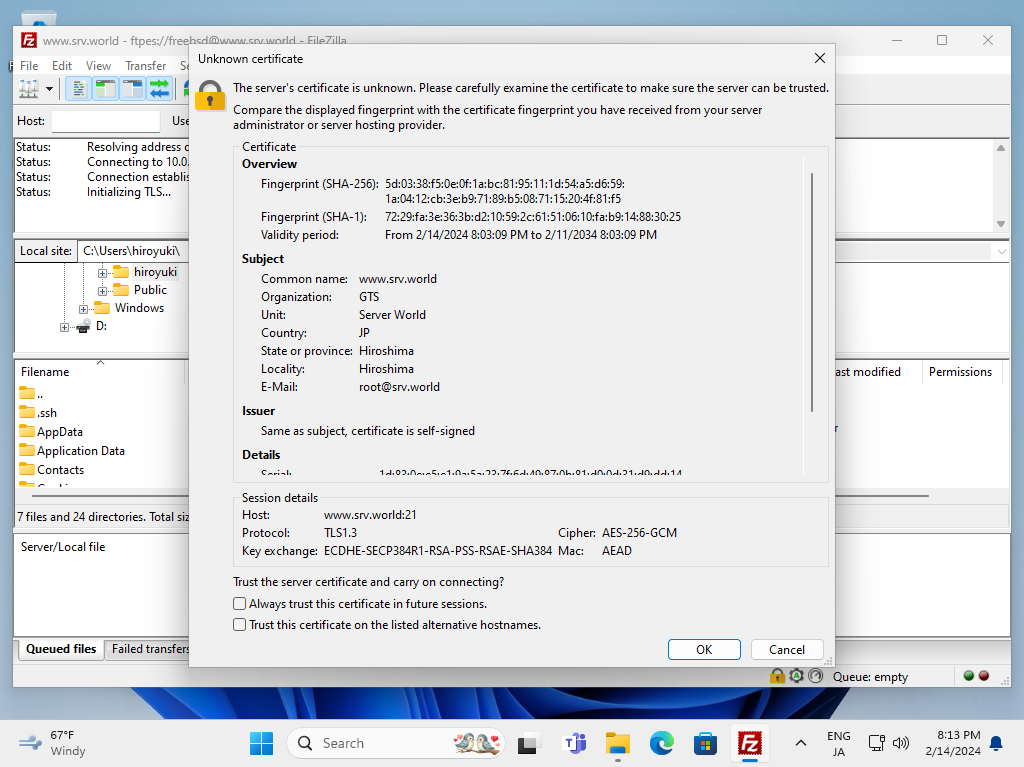
| [6] | 自己署名の証明書の場合、以下のような警告が表示されますが、問題ないので [OK] ボタンをクリックして先へ進めます。 |
|
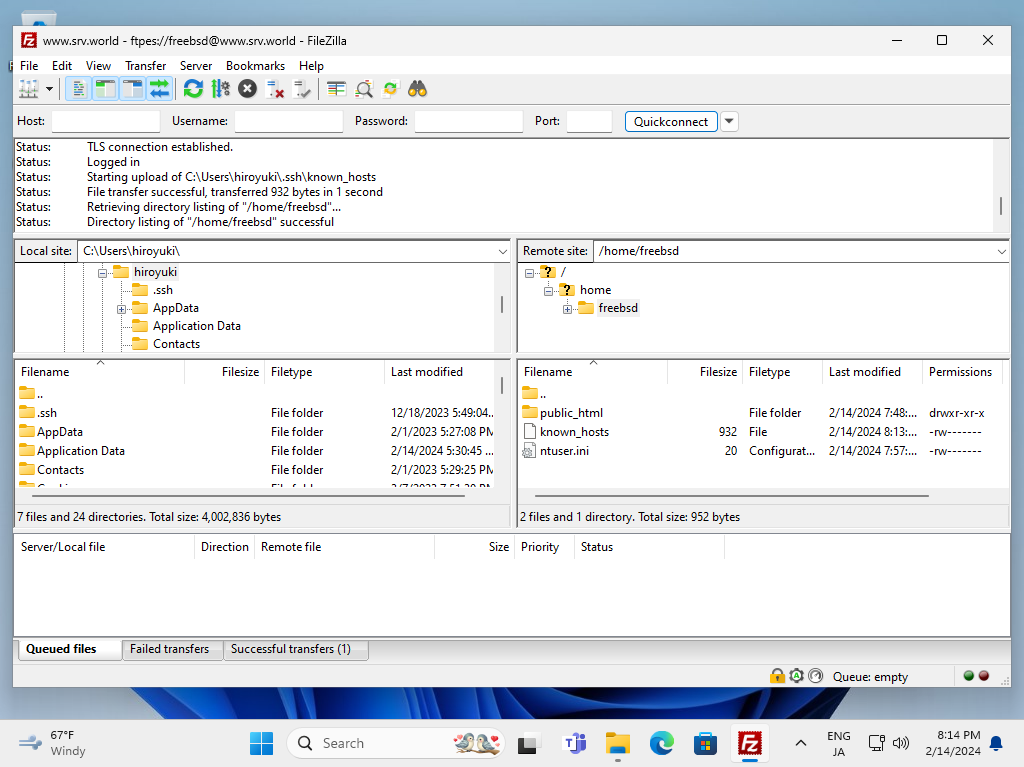
| [7] | 設定に問題なければ以下のように接続できます。問題なくファイル転送ができるか等々確認しておくとよいでしょう。 |
|
関連コンテンツ