Webメールシステム : RoundCube2016/06/13 |
|
RoundCube をインストールして、Yahoo メールや Hotmail のような Web メールシステムを構築します。
当例では下記の通り、同一 LAN 内の別ホストのメールサーバーを利用するように設定します。
またバックエンドでデータベースを使うため、MySQL, SQLite, PostgreSQL のいずれかが導入済みである必要があります。
ここでは MySQL 互換の MariaDB を利用するよう設定します。
|
|||||
| [1] |
こちらを参考に SMTP サーバーをインストール・起動しておきます。
|
||||
| [2] |
こちらを参考に IMAP サーバーをインストール・起動しておきます。
|
||||
| [3] | |||||
| [4] | |||||
| [5] | |||||
| [6] | RoundCube 用のデータベースを作成しておきます。 |
|
root@www:~# mysql -u root -p Enter password: Welcome to the MariaDB monitor. Commands end with ; or \g. Your MariaDB connection id is 40 Server version: 10.0.25-MariaDB-0ubuntu0.16.04.1 Ubuntu 16.04 Copyright (c) 2000, 2016, Oracle, MariaDB Corporation Ab and others. Type 'help;' or '\h' for help. Type '\c' to clear the current input statement. # 「roundcube」データベース作成 ( 'password'の箇所は設定するパスワードを入力 )
MariaDB [(none)]>
create database roundcube; Query OK, 1 row affected (0.00 sec)
MariaDB [(none)]>
grant all privileges on roundcube.* to roundcube@'localhost' identified by 'password'; Query OK, 0 rows affected (0.00 sec)
MariaDB [(none)]>
MariaDB [(none)]> flush privileges; Query OK, 0 rows affected (0.00 sec) exit Bye |
| [7] | RoundCube のインストールと設定です。 |
|
root@www:~#
apt-get -y install roundcube roundcube-mysql # データベースの設定は後ほど手動実行するとして、ここは「No」 +----------------------+ Configuring roundcube-core +-----------------------+ | | | The roundcube package must have a database installed and configured | | before it can be used. This can be optionally handled with | | dbconfig-common. | | | | If you are an advanced database administrator and know that you want to | | perform this configuration manually, or if your database has already | | been installed and configured, you should refuse this option. Details | | on what needs to be done should most likely be provided in | | /usr/share/doc/roundcube. | | | | Otherwise, you should probably choose this option. | | | | Configure database for roundcube with dbconfig-common? | | | | <Yes> <No> | | | +---------------------------------------------------------------------------+root@www:~# cd /usr/share/dbconfig-common/data/roundcube/install root@www:/usr/share/dbconfig-common/data/roundcube/install# mysql -u roundcube -D roundcube -p < mysql Enter password: # MariaDB roundcube パスワード root@www:/usr/share/dbconfig-common/data/roundcube/install#
root@www:~#
vi /etc/roundcube/debian-db.php # データベース情報を設定 $dbuser=' roundcube ';$dbpass=' password ';$basepath=''; $dbname=' roundcube ';$dbserver='localhost'; $dbport=''; $dbtype=' mysql ';
root@www:~#
vi /etc/roundcube/config.inc.php # 35行目:IMAPサーバー指定 (SSL) $config['default_host'] = 'ssl://mail.srv.world'; # 47行目:SMTPサーバー指定 (SSL) $config['smtp_server'] = 'ssl://mail.srv.world'; # 51行目:SMTPポート指定 (SSL) $config['smtp_port'] = 465; # 55行目:変更 (SMTP認証にIMAP認証と同じユーザーを利用) $config['smtp_user'] = '%u'; # 59行目:変更 (SMTP認証にIMAP認証と同じパスワードを利用) $config['smtp_pass'] = '%p'; # 66行目:変更 (表示画面のタイトル) $config['product_name'] = 'Server World Webmail'; # 最終行に追記 # IMAPポート指定 (SSL) $config['default_port'] = 993; # SMTP認証タイプを指定 $config['smtp_auth_type'] = 'LOGIN'; # SMTP HELO host を指定 $config['smtp_helo_host'] = 'mail.srv.world'; # ドメイン名を指定 $config['mail_domain'] = 'srv.world'; # UserAgent を指定 $config['useragent'] = 'Server World Webmail'; # SMTP と IMAP の接続オプションを指定
$config['imap_conn_options'] = array(
  'ssl'         => array(
    'verify_peer' => true,
    'CN_match' => 'srv.world',
    'allow_self_signed' => true,
    'ciphers' => 'HIGH:!SSLv2:!SSLv3',
  ),
);
$config['smtp_conn_options'] = array(
  'ssl'         => array(
    'verify_peer' => true,
    'CN_match' => 'srv.world',
    'allow_self_signed' => true,
    'ciphers' => 'HIGH:!SSLv2:!SSLv3',
  ),
);
root@www:~#
vi /etc/apache2/conf-enabled/roundcube.conf # 3行目:コメント解除 Alias /roundcube /var/lib/roundcube # 11行目:必要であればアクセス許可変更 Require ip 127.0.0.1 10.0.0.0/24
phpenmod mcrypt root@www:~# systemctl restart apache2
|
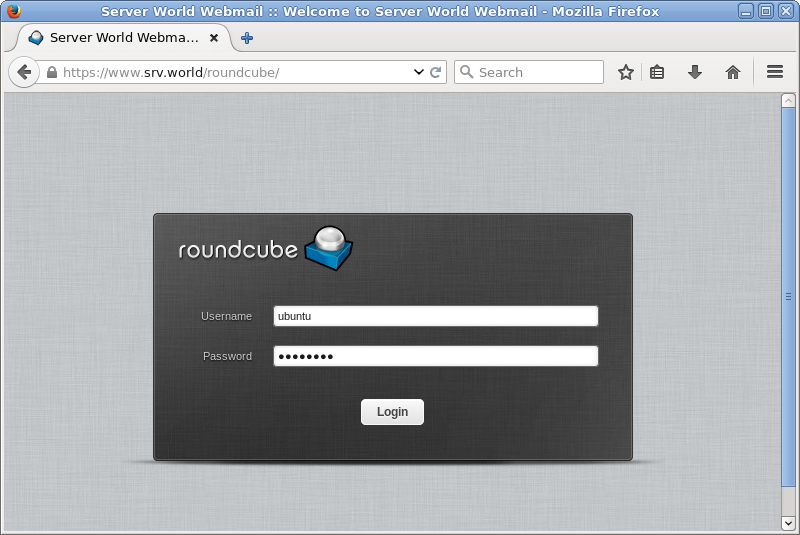
| [8] | クライアントPC で Web ブラウザを起動し、「https://(サーバーのホスト名またはIPアドレス)/roundcube/」にアクセスします。 すると以下のようにログイン画面になるのでユーザー名とパスワードを入力してログインします。 |
|
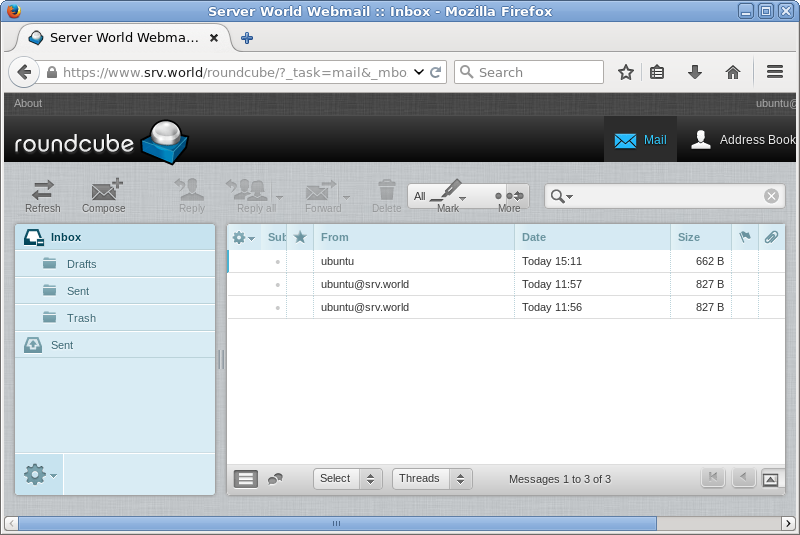
| [9] | ログインできました。 |
|
関連コンテンツ