Code Server : インストール2025/03/19 |
|
Visual Studio Code を自身のサーバーで実行可能な Code Server のインストールと設定です。 |
|
| [1] | Code Server をインストールします。 |
|
[root@dlp ~]#
[root@dlp ~]# wget https://code-server.dev/install.sh bash install.sh CentOS Stream 9 Installing v4.98.2 of the amd64 rpm package from GitHub. + mkdir -p ~/.cache/code-server + curl -#fL -o ~/.cache/code-server/code-server-4.98.2-amd64.rpm.incomplete -C - https://github.com/coder/code-server/releases/download/v4.98.2/code-server-4.98.2-amd64.rpm ######################################################################## 100.0% + mv ~/.cache/code-server/code-server-4.98.2-amd64.rpm.incomplete ~/.cache/code-server/code-server-4.98.2-amd64.rpm + rpm -U ~/.cache/code-server/code-server-4.98.2-amd64.rpm [ 257.789426] systemd-rc-local-generator[986]: /etc/rc.d/rc.local is not marked executable, skipping. rpm package has been installed. To have systemd start code-server now and restart on boot: sudo systemctl enable --now code-server@$USER Or, if you don't want/need a background service you can run: code-server Deploy code-server for your team with Coder: https://github.com/coder/coder |
| [2] | 任意の一般ユーザーで Code Server を起動して動作確認します。 自己署名の証明書を使用して HTTPS で他ホストからもアクセスできるように設定します。 |
|
# 証明書作成 [cent@dlp ~]$ cd ~/.config/code-server [cent@dlp code-server]$ openssl ecparam -name prime256v1 -genkey -out server.key [cent@dlp code-server]$ openssl req -new -key server.key -out server.csr You are about to be asked to enter information that will be incorporated into your certificate request. What you are about to enter is what is called a Distinguished Name or a DN. There are quite a few fields but you can leave some blank For some fields there will be a default value, If you enter '.', the field will be left blank. ----- Country Name (2 letter code) [AU]:JP # 国 State or Province Name (full name) [Some-State]:Hiroshima # 地域(県) Locality Name (eg, city) []:Hiroshima # 都市 Organization Name (eg, company) [Internet Widgits Pty Ltd]:GTS # 組織名 Organizational Unit Name (eg, section) []:Server World # 組織の部門名 Common Name (e.g. server FQDN or YOUR name) []:dlp.srv.world # サーバーの FQDN Email Address []:cent@dlp.srv.world # 管理者アドレス Please enter the following 'extra' attributes to be sent with your certificate request A challenge password []: An optional company name []: # サーバーの DNS 名と IP アドレスは自身の環境に置き換え [cent@dlp code-server]$ echo 'subjectAltName = DNS:dlp.srv.world, IP:10.0.0.30' > altname.txt [cent@dlp code-server]$ openssl x509 -in server.csr -out server.crt -req -signkey server.key -extfile altname.txt -days 3650
[cent@dlp code-server]$
vi ~/.config/code-server/config.yaml # bind-addr : 他ホストからもアクセスする場合はリスンする IP アドレス または [0.0.0.0] (全てリスン) を指定 # * bind-addr のポートは一般ユーザーの場合 1024 以上の任意のポートを指定可 # password : 任意のログインパスワードを指定 # cert, cert-key : 作成した証明書を指定 bind-addr: 0.0.0.0:8082 auth: password password: mypassword01 cert: /home/cent/.config/code-server/server.crt cert-key: /home/cent/.config/code-server/server.key[cent@dlp code-server]$ chmod 600 ~/.config/code-server/config.yaml [cent@dlp code-server]$ systemctl --user start code-server
|
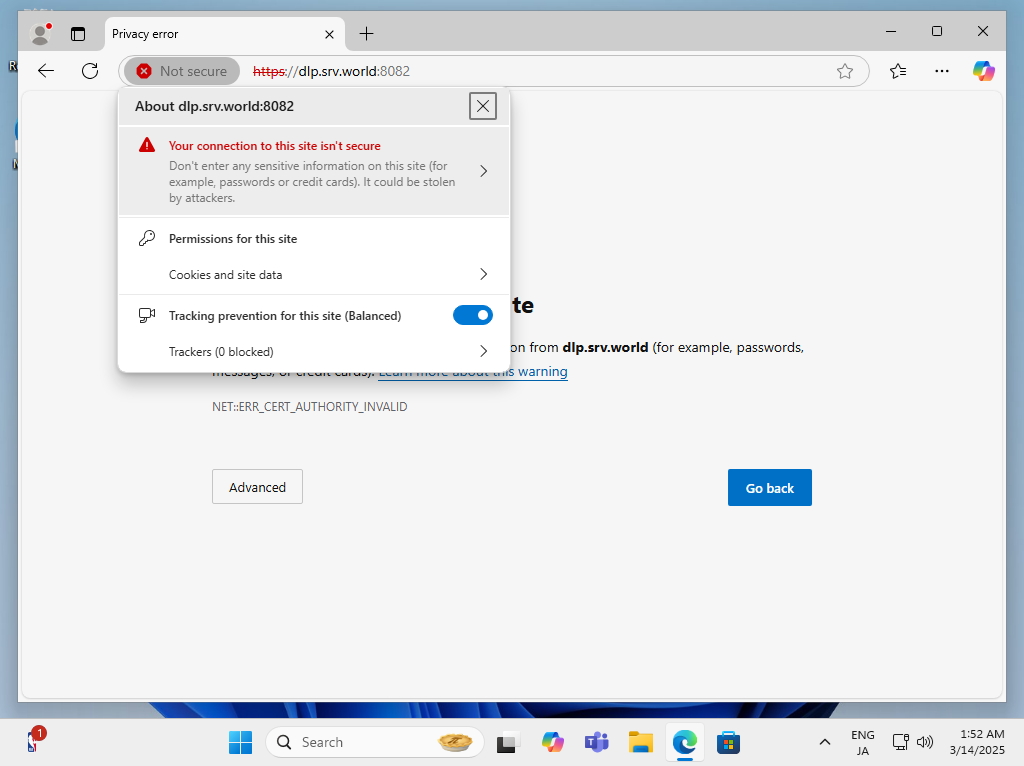
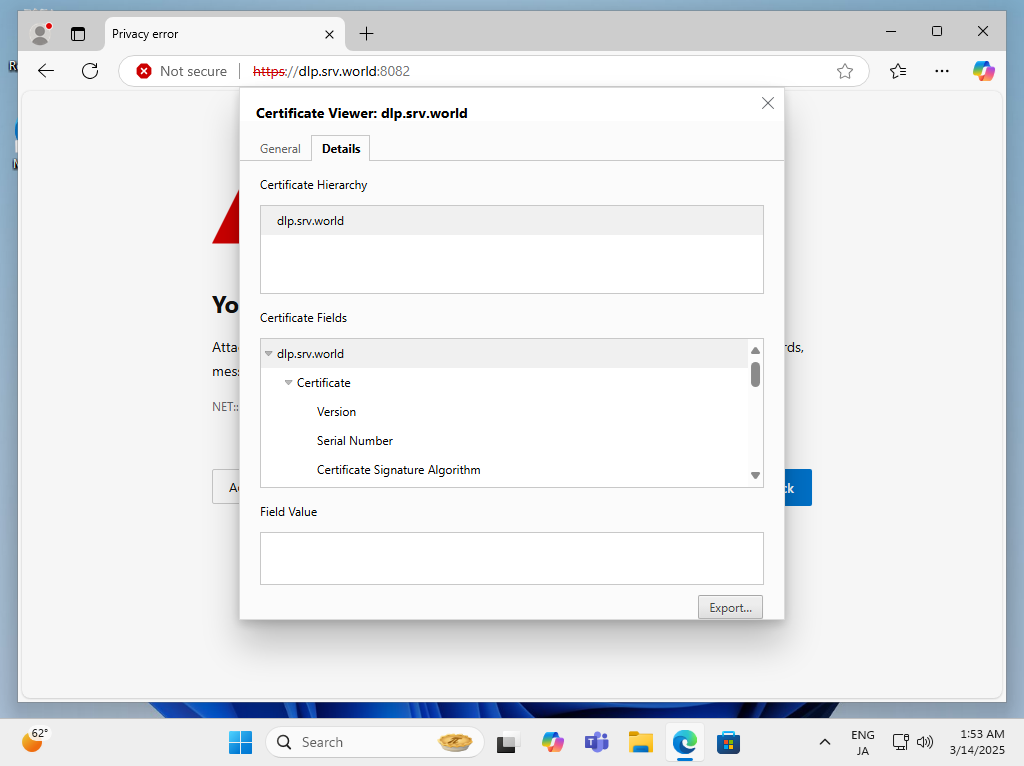
| [3] | 任意のクライアントコンピューターで Web ブラウザーを起動し、設定した URL へアクセスします。 自己署名の証明書の場合、エラーを無視してログインしても、ログイン後のサービスワーカーの起動に失敗するため、事前に証明書をクライアントコンピューターにインストールして信頼させておきます。 証明書のフィールドをクリックして証明書を表示します。 |
|
| [4] | [詳細] タブに移動して [エクスポート] をクリックし、コンピューターの任意の場所へファイルを保存します。 |
|
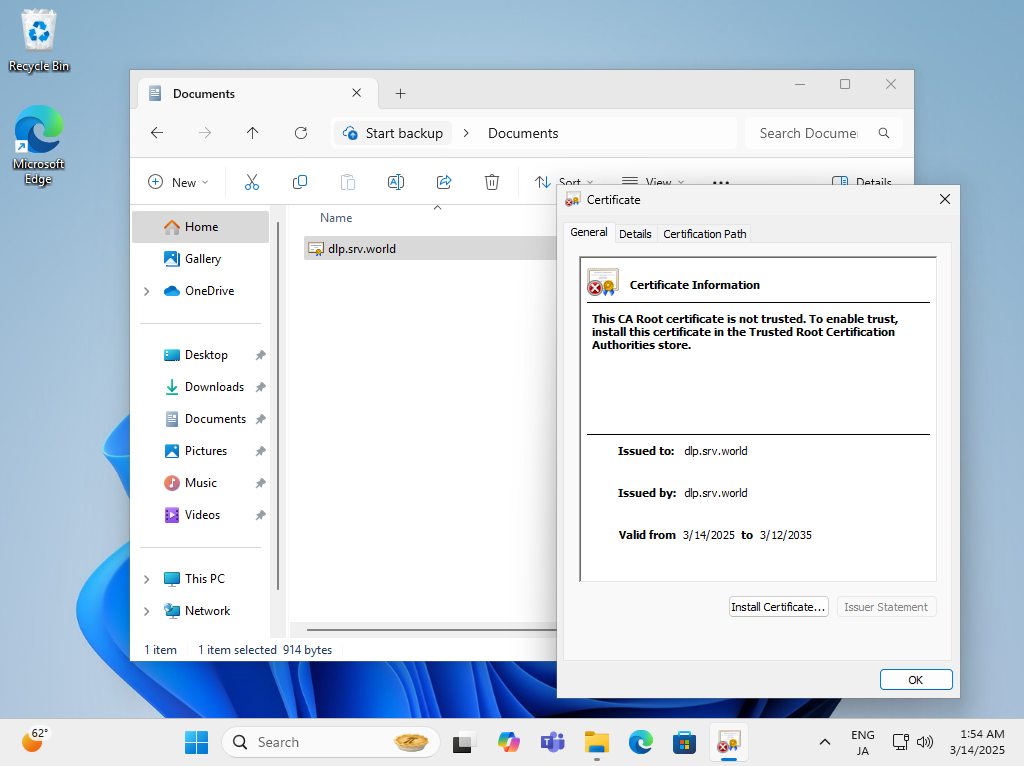
| [5] | 保存したファイルをクリックして、[証明書をインストール] をクリックします。 |
|
| [6] | [現在のユーザー] を選択して進み、証明書のインストール先に [信頼されたルート証明機関] を選択してインストールします。 |

|
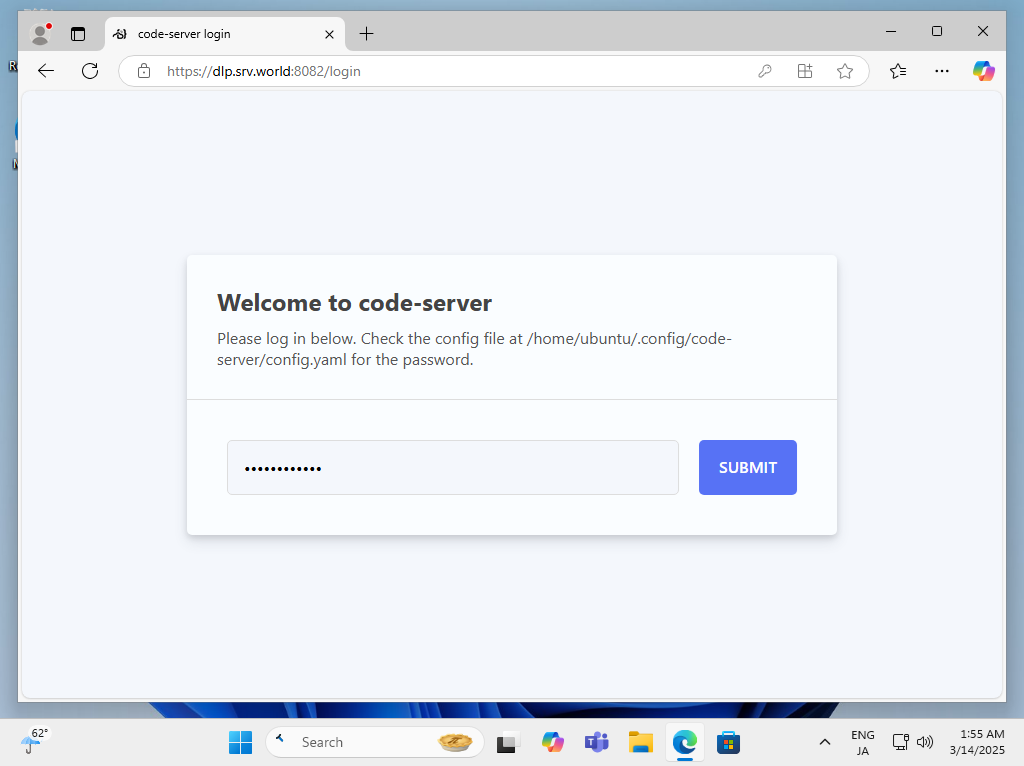
| [7] | 再度、設定した URL へアクセスすると、ログイン画面が表示されます。 設定したパスワードでログインできます。 |
|
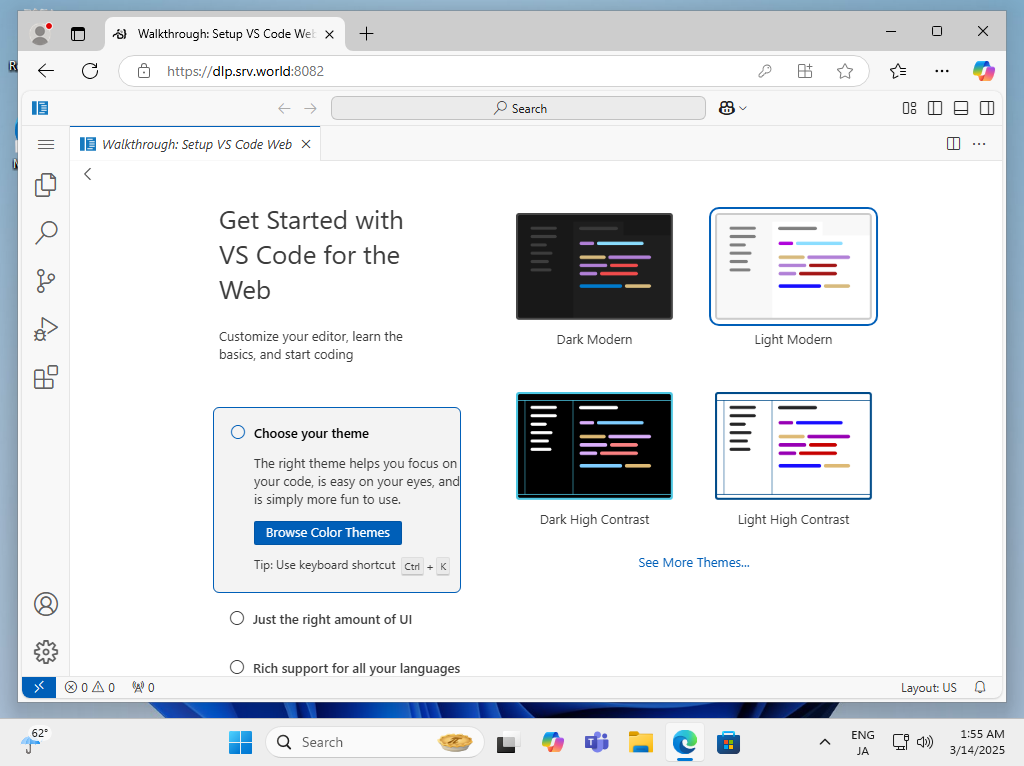
| [8] | 正常にログインできればインストール完了です。 |
|
|
関連コンテンツ