Jitsi Meet : インストール2024/07/05 |
|
オンライン 会議システム Jitsi Meet をインストールします。
|
|
| [1] | |
| [2] | Jitsi Meet をインストールします。 |
|
root@dlp:~# curl -fsSL https://download.jitsi.org/jitsi-key.gpg.key -o /etc/apt/keyrings/jitsi-key.gpg.key root@dlp:~# echo "deb [signed-by=/etc/apt/keyrings/jitsi-key.gpg.key] https://download.jitsi.org stable/" | tee /etc/apt/sources.list.d/jitsi.list root@dlp:~# apt update root@dlp:~# apt -y install jitsi-meet # Jitsi Meet をインストールするホスト名を入力 +---------------+ Configuring jitsi-videobridge2 +---------------+ | The value of the domain that is set in the Jitsi Videobridge | | installation. | | | | The domain of the current installation (e.g. meet.jitsi.com): | | | | dlp.srv.world_________________________________________________ | | | | <Ok> | | | +----------------------------------------------------------------+ # 証明書の取得方法を選択 # 当例では [1] で取得済みのため [I want to use my own certificate] を選択 +------+ Configuring jitsi-meet-web-config +------+ | SSL certificate | | | | Let's Encrypt certificates | | I want to use my own certificate | | Generate a new self-signed certificate | | | | | | <Ok> | | | +-------------------------------------------------+ # 証明書のキーファイルのパスを指定 +-----------------+ Configuring jitsi-meet-web-config +-----------------+ | The full path to the SSL key file on the server. If it has not been | | uploaded, now is a good time to do so. | | | | Full local server path to the SSL key file: | | | | /etc/letsencrypt/live/dlp.srv.world/privkey.pem______________________ | | | | <Ok> | | | +-----------------------------------------------------------------------+ # 証明書ファイルのパスを指定 +-------------------+ Configuring jitsi-meet-web-config +-------------------+ | The full path to the SSL certificate file on the server. If you haven't | | uploaded it, now is a good time to upload it in another console. | | | | Full local server path to the SSL certificate file: | | | | /etc/letsencrypt/live/dlp.srv.world/fullchain.pem________________________ | | | | <Ok> | | | +---------------------------------------------------------------------------+ # ダイアルインサポートを有効にするか否か # 当例では [no] を選択 +------------------+ Configuring jitsi-meet-web-config +------------------+ | | | You can easily add dial-in support to your meetings. To allow this we | | would need your permission to create a free JaaS (Jitsi as a Service) | | account for you. | | | | Add telephony to your Jitsi meetings? | | | | <Yes> <No> | | | +-------------------------------------------------------------------------+ |
| [3] | Jitsi Meet の設定です。認証を有効化しておきます。 |
|
root@dlp:~#
vi /etc/prosody/conf.avail/dlp.srv.world.cfg.lua # 39行目 : 認証を有効に変更 VirtualHost "dlp.srv.world" authentication = "internal_hashed" -- do not delete me ..... ..... # 上記 [VirtualHost] ブロックの下に追記 # [guest.(your hostname)] は Jitsi 内部で使用されるのみのため DNS 登録不要 VirtualHost "guest.dlp.srv.world" authentication = "anonymous" c2s_require_encryption = false
root@dlp:~#
vi /etc/jitsi/meet/dlp.srv.world-config.js
var config = {
    // Connection
    //

    hosts: {
        // XMPP domain.
        domain: 'www.server.education',

        // When using authentication, domain for guest users.
        // 36行目 : コメント解除して [guest] の後を自身のホスト名に変更
        anonymousdomain: 'guest.dlp.srv.world',
root@dlp:~#
vi /etc/jitsi/jicofo/jicofo.conf
jicofo {
  # [authentication] ブロックを追記
  authentication: {
    enabled: true
    type: XMPP
    login-url: "dlp.srv.world"
  }
  xmpp: {
    client: {
.....
.....
# 任意のユーザー登録 # prosodyctl register (username) (hostname) (password) root@dlp:~# prosodyctl register serverworld dlp.srv.world mypassword |
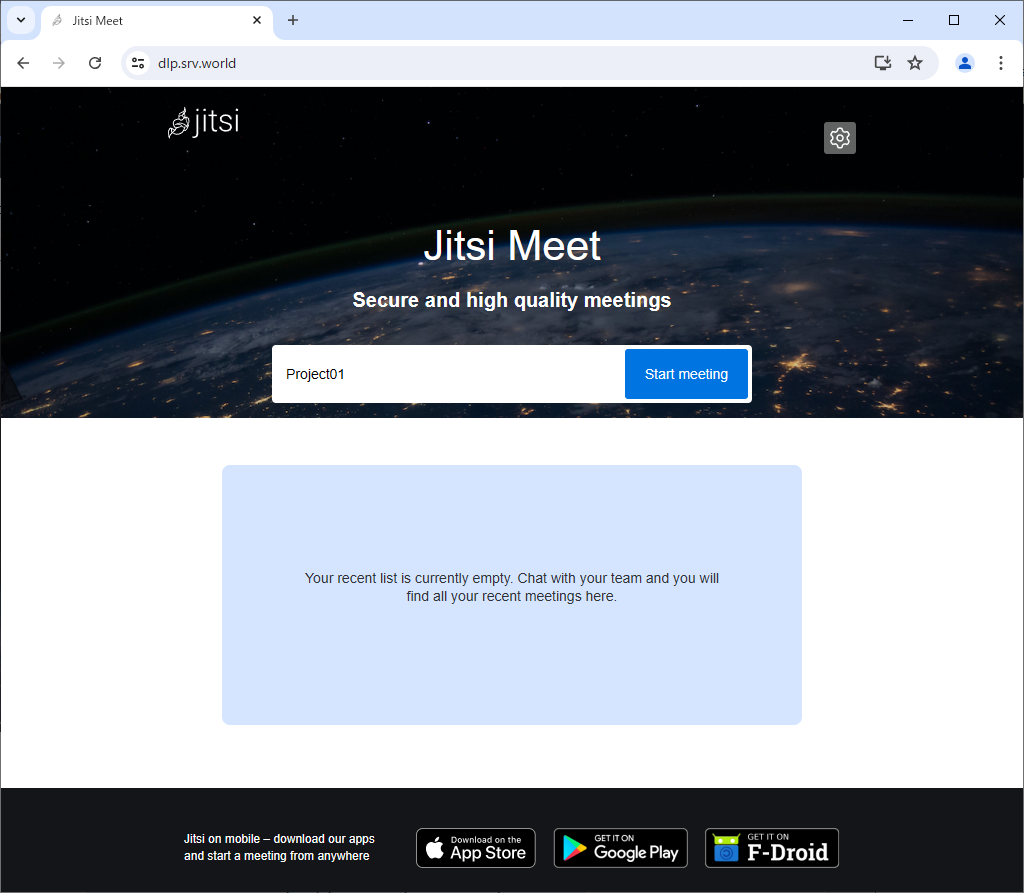
| [4] | 任意のクライアントコンピューターで Web ブラウザーを起動し、インストール時に設定したホスト名の URL にアクセスすると Jitsi Meet のサイトが表示されます。任意のミーティング名称を入力して [ミーティングを開始] をクリックします。 |
|
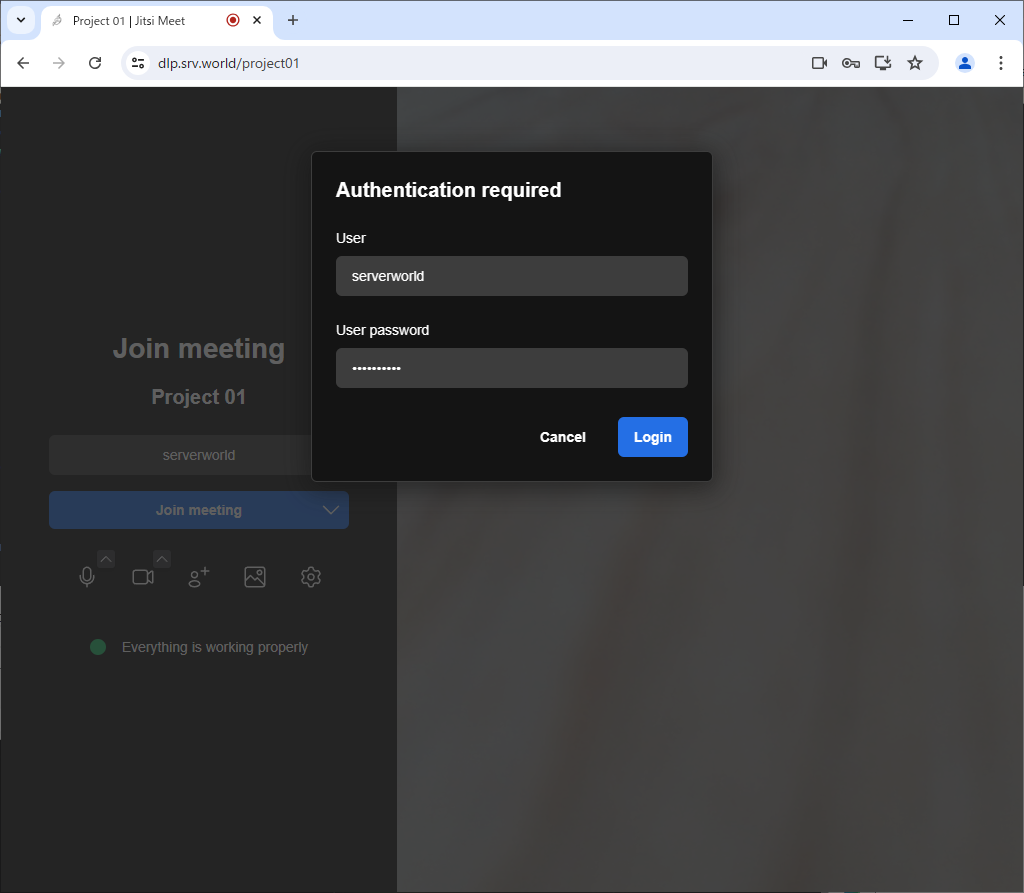
| [5] | 登録したユーザー名/パスワードでログインします。 |

|
|
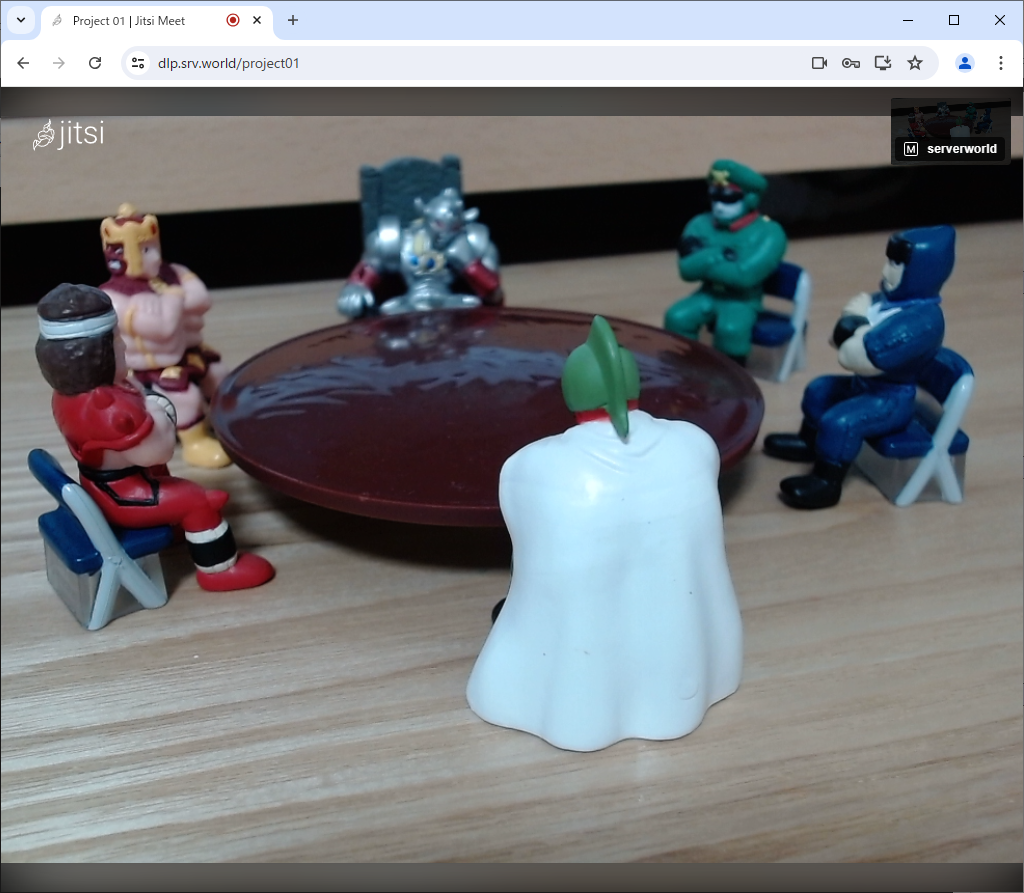
| [6] | 認証が成功すると、ミーティングに参加できます。 |
|
関連コンテンツ